Let’s be brave.
Let’s learn how to use GitHub.
What is GitHub?
GitHub is a technology designed to facilitate collaboration associated with coding projects. The website serves as a cloud-based repository for code, and users “push” and “pull” the code to/from GitHub. But there is another layer of “control” over how things work – version control – which allows you to track iterations and changes to your code over time. Where this really shines is when you have more than one person working on the code at the same time. You can all work on different aspects of the same code base and iteratively “push” your changes and “merge” them together without having to copy / paste code from one file to another. Of course, this can lead to problems. If someone makes a change on an old version of the repository and then tries to push their changes, merge conflicts can happen.
Getting started.
So we are going to start simple. We will first learn how to ‘push’ and ‘pull’ from a GitHub repo. Before doing so, you will need to create a GitHub profile.
Navigate to GitHub and create an account. Because I also plan to show you how easy it is to make a github.io wepage, I would suggest choosing a username you think is okay to have as your webpage URL. For example, mine is scskalicky, which I wouldn’t mind sharing. But if you’re comfortable using kitten_slayer_69 as your username, you do you.
After you create your GitHub profile, email Stephen your GitHub username. I will then add you to our private GitHub repository.
Adding GitHub to your R Studio
You’re going to need to first make sure you have Git installed on your computer.
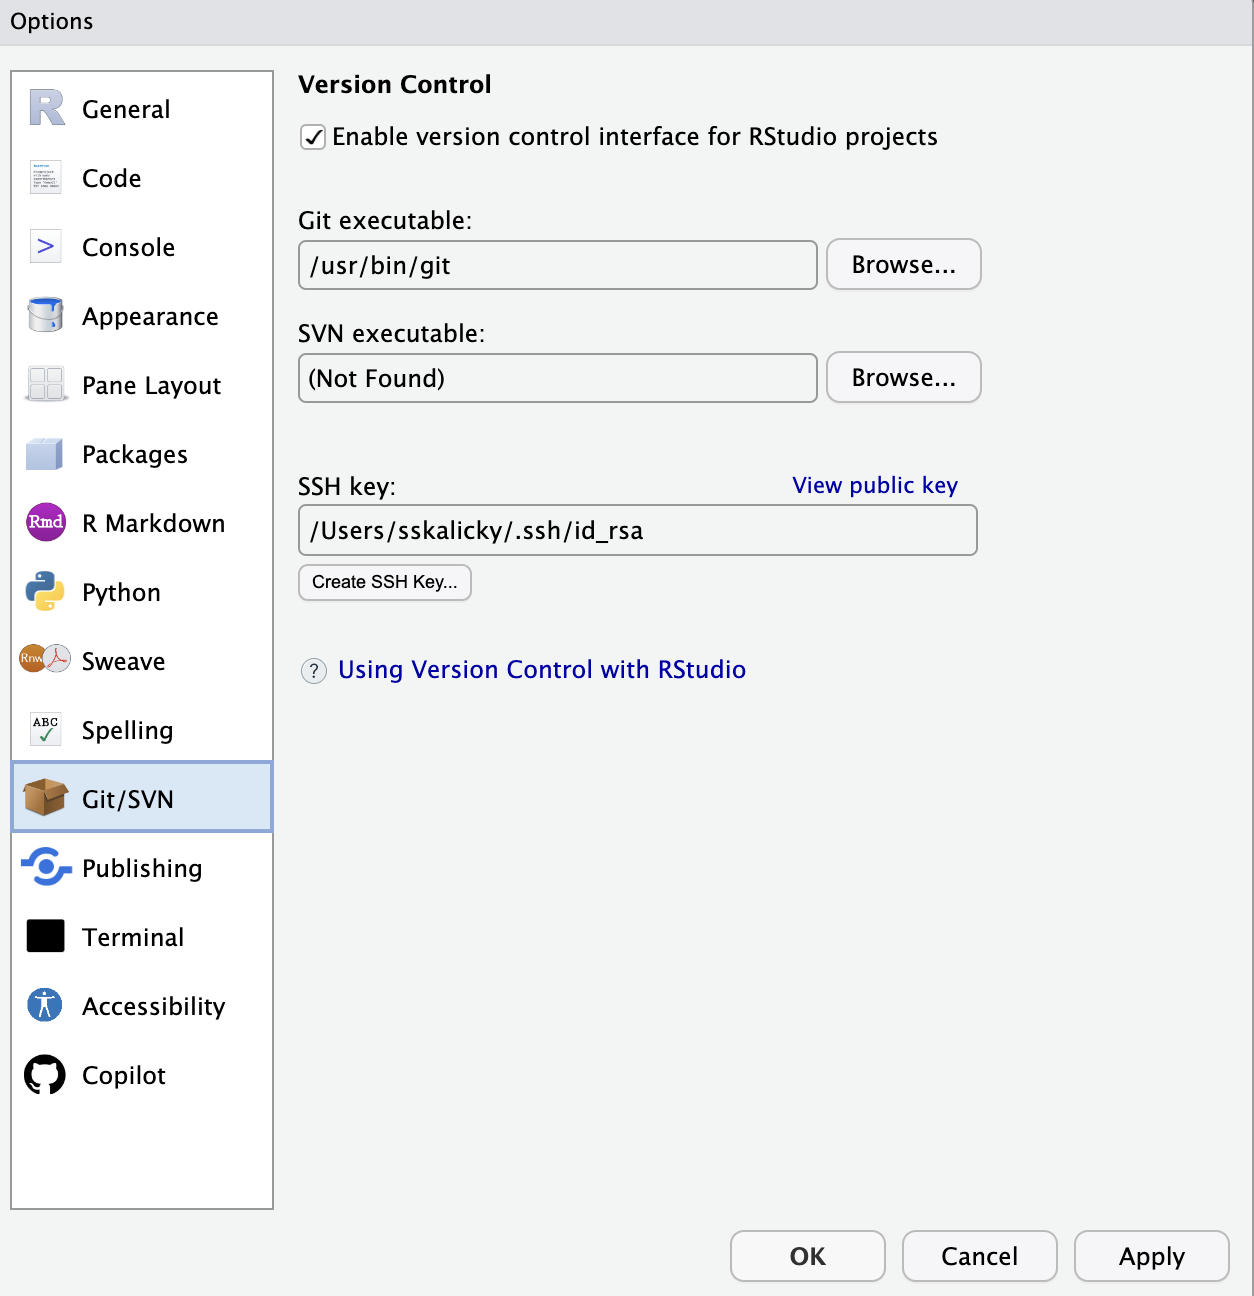
You then need to make sure R Studio “sees” Git on your computer. You can check this by going to the Global Options, and then looking at the Git/SVN category on the left menu bar. You want there to be a filepath for R Studio to a Git executable, such as seen in this screenshot:
Adding SSH authentication
Notice in the above screenshot that there is a file located inside the SSH Key field. You will need to do that same thing, adding SSH authentication to your R Studio so that you can clone the private repository. Basically, you will create what is called a key with a private/public pair. To do so, you need to generate an SSH key with R Studio.
Click the Create SSH Key button, which will pop up a window like this:
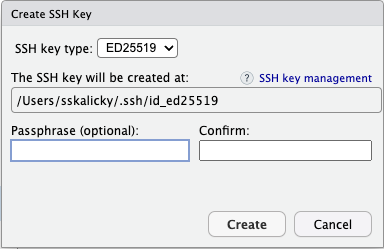
You can choose to give it a passphrase if you like. I prefer to live dangerously and leave it blank, so I am not prompted for it each time I connect.
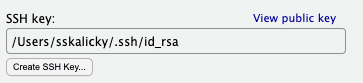
Once you generate the key, you will need to locate the “public” version of the key. Fortunately R Studio has a “view public key” link in the same window after you generate your key:
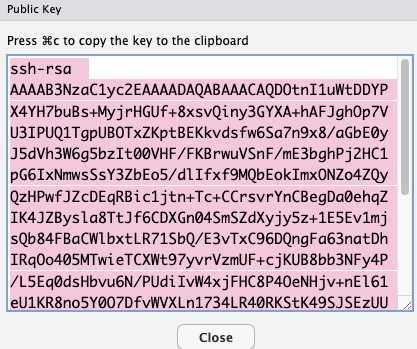
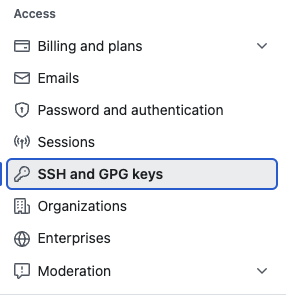
Open the public key and copy the text to the clipboard. Then go to your GitHub profile, and click settings.
Choose the SSH and GPG Keys option:
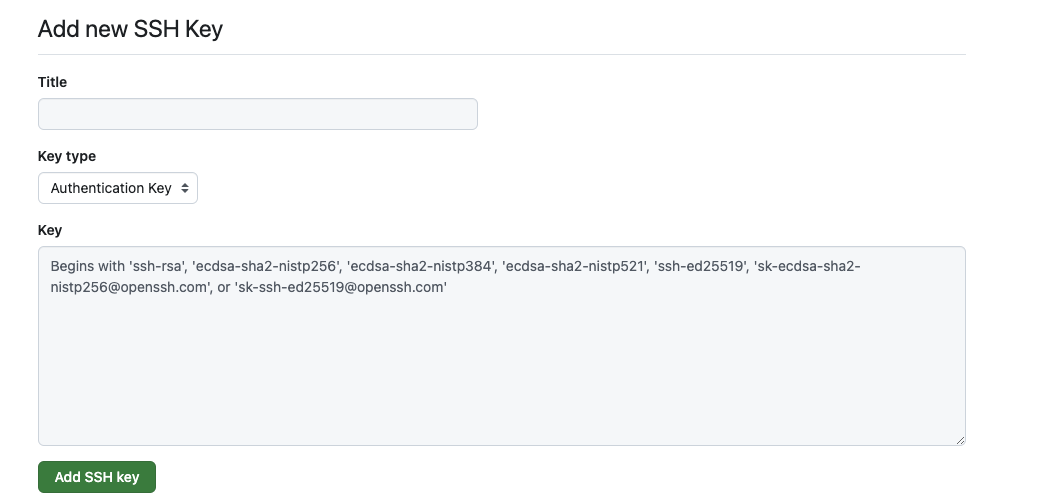
Then choose to create a new SSH key:

Then paste the public key into the Key area. Give the key a title and click Add SSH Key
Your R Studio should now be configured to connect to SSH repositories on GitHub.
- If you’ve gotten that far, next you’ll need the URL for the GitHub repository. To find it, go to the GitHub page for the repository, and click the green
\<\> Codebutton, shown on the top right in this screenshot:
Click the button, and you will see a menu pop up with HTTPS, SSH, and GitHub CLI options. Click the SSH option, and then copy and paste that URL.
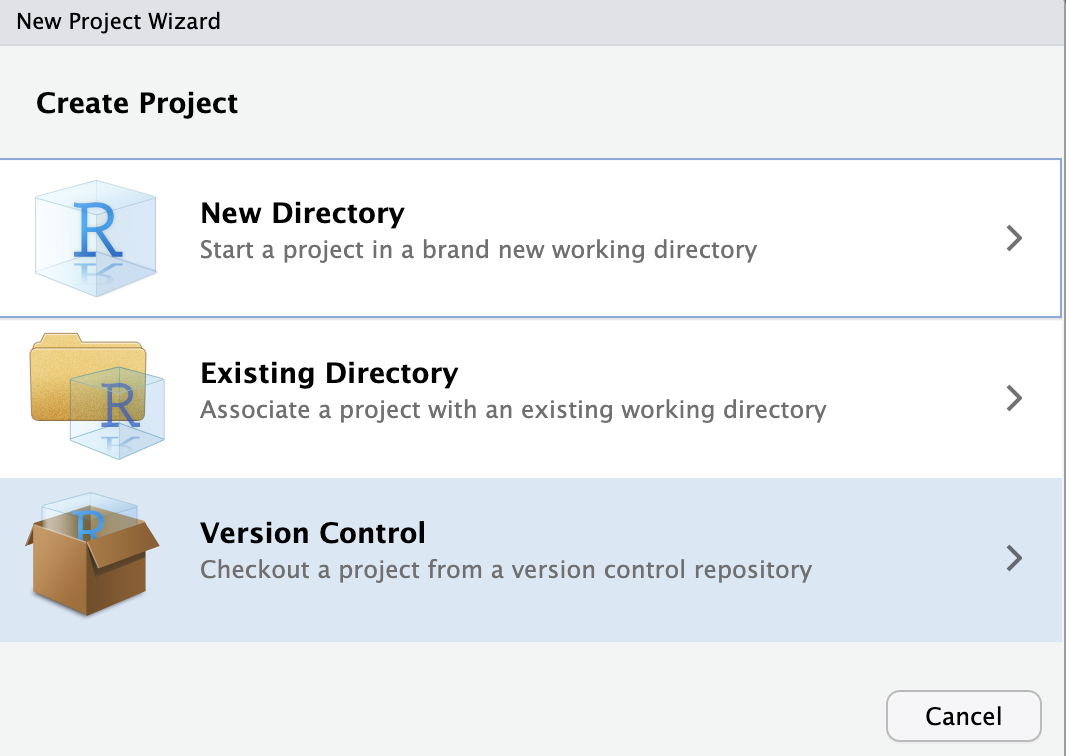
- Now, open R Studio, and create a new project. When you are given the first three options, choose Version Control
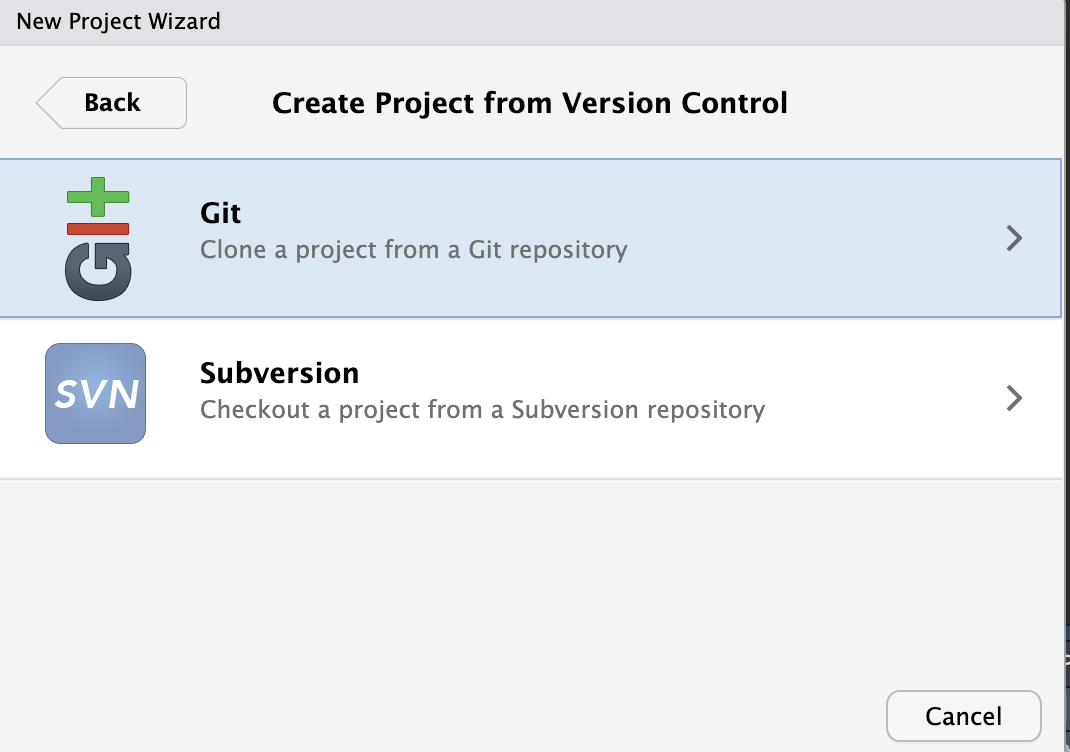
On the next screen, choose Git:
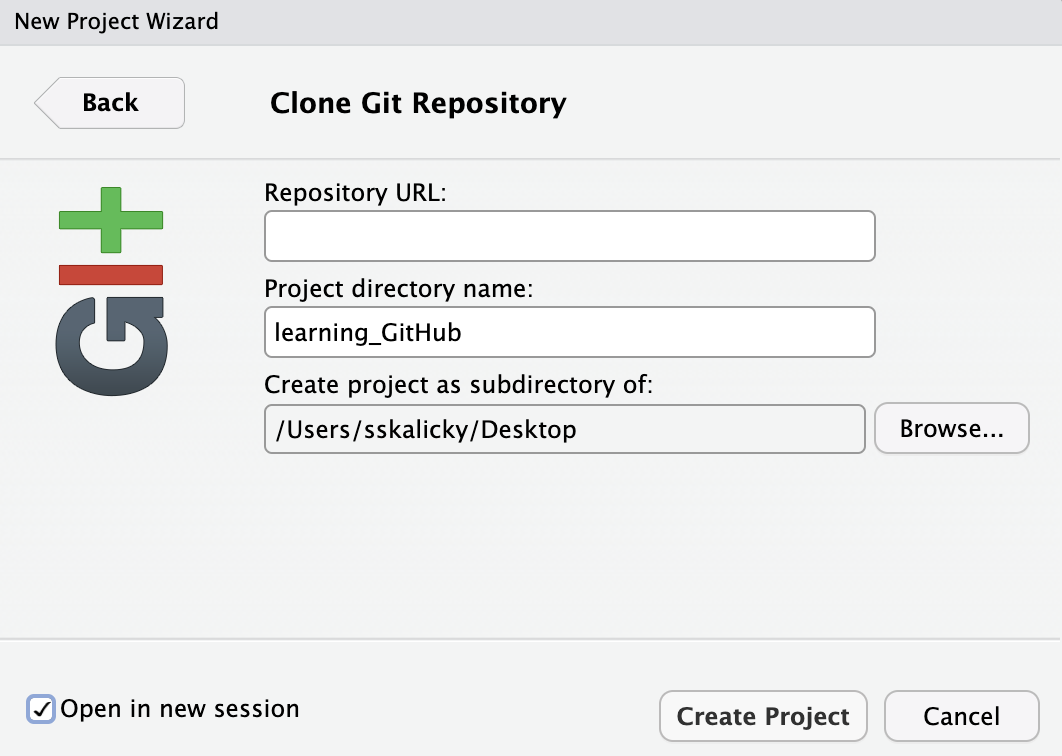
On the next screen, copy and paste the SSH URL into the Repository URL box. The project directory name will be the name of the folder saved on your computer, it’s probably smart to give it the same name as your repository. Finally, choose the location on your computer for that repository. You can see I chose my secure Desktop location:
Pop all of that into the boxes and then click Create Project. You should see a box pop up and spam you with messages talking about making clones. Then a new R Studio window should open, which means you should have successfully cloned the repository.
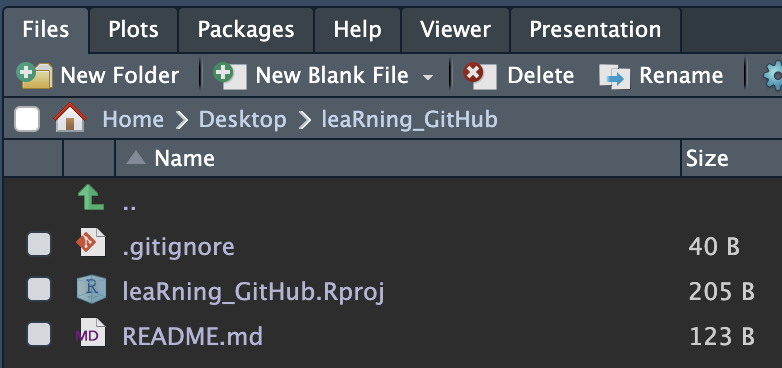
If you look at the Files tab in R Studio, you should see something like this:
Testing your connection
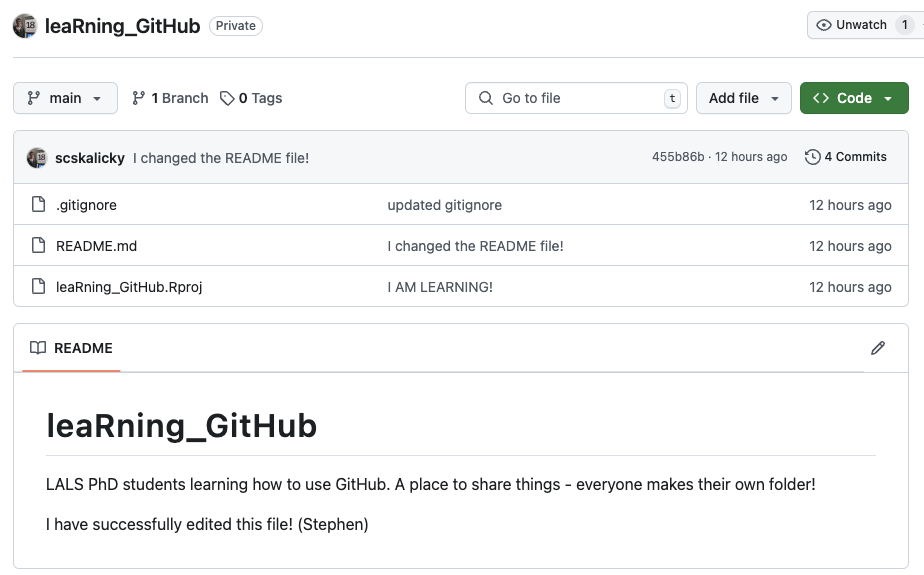
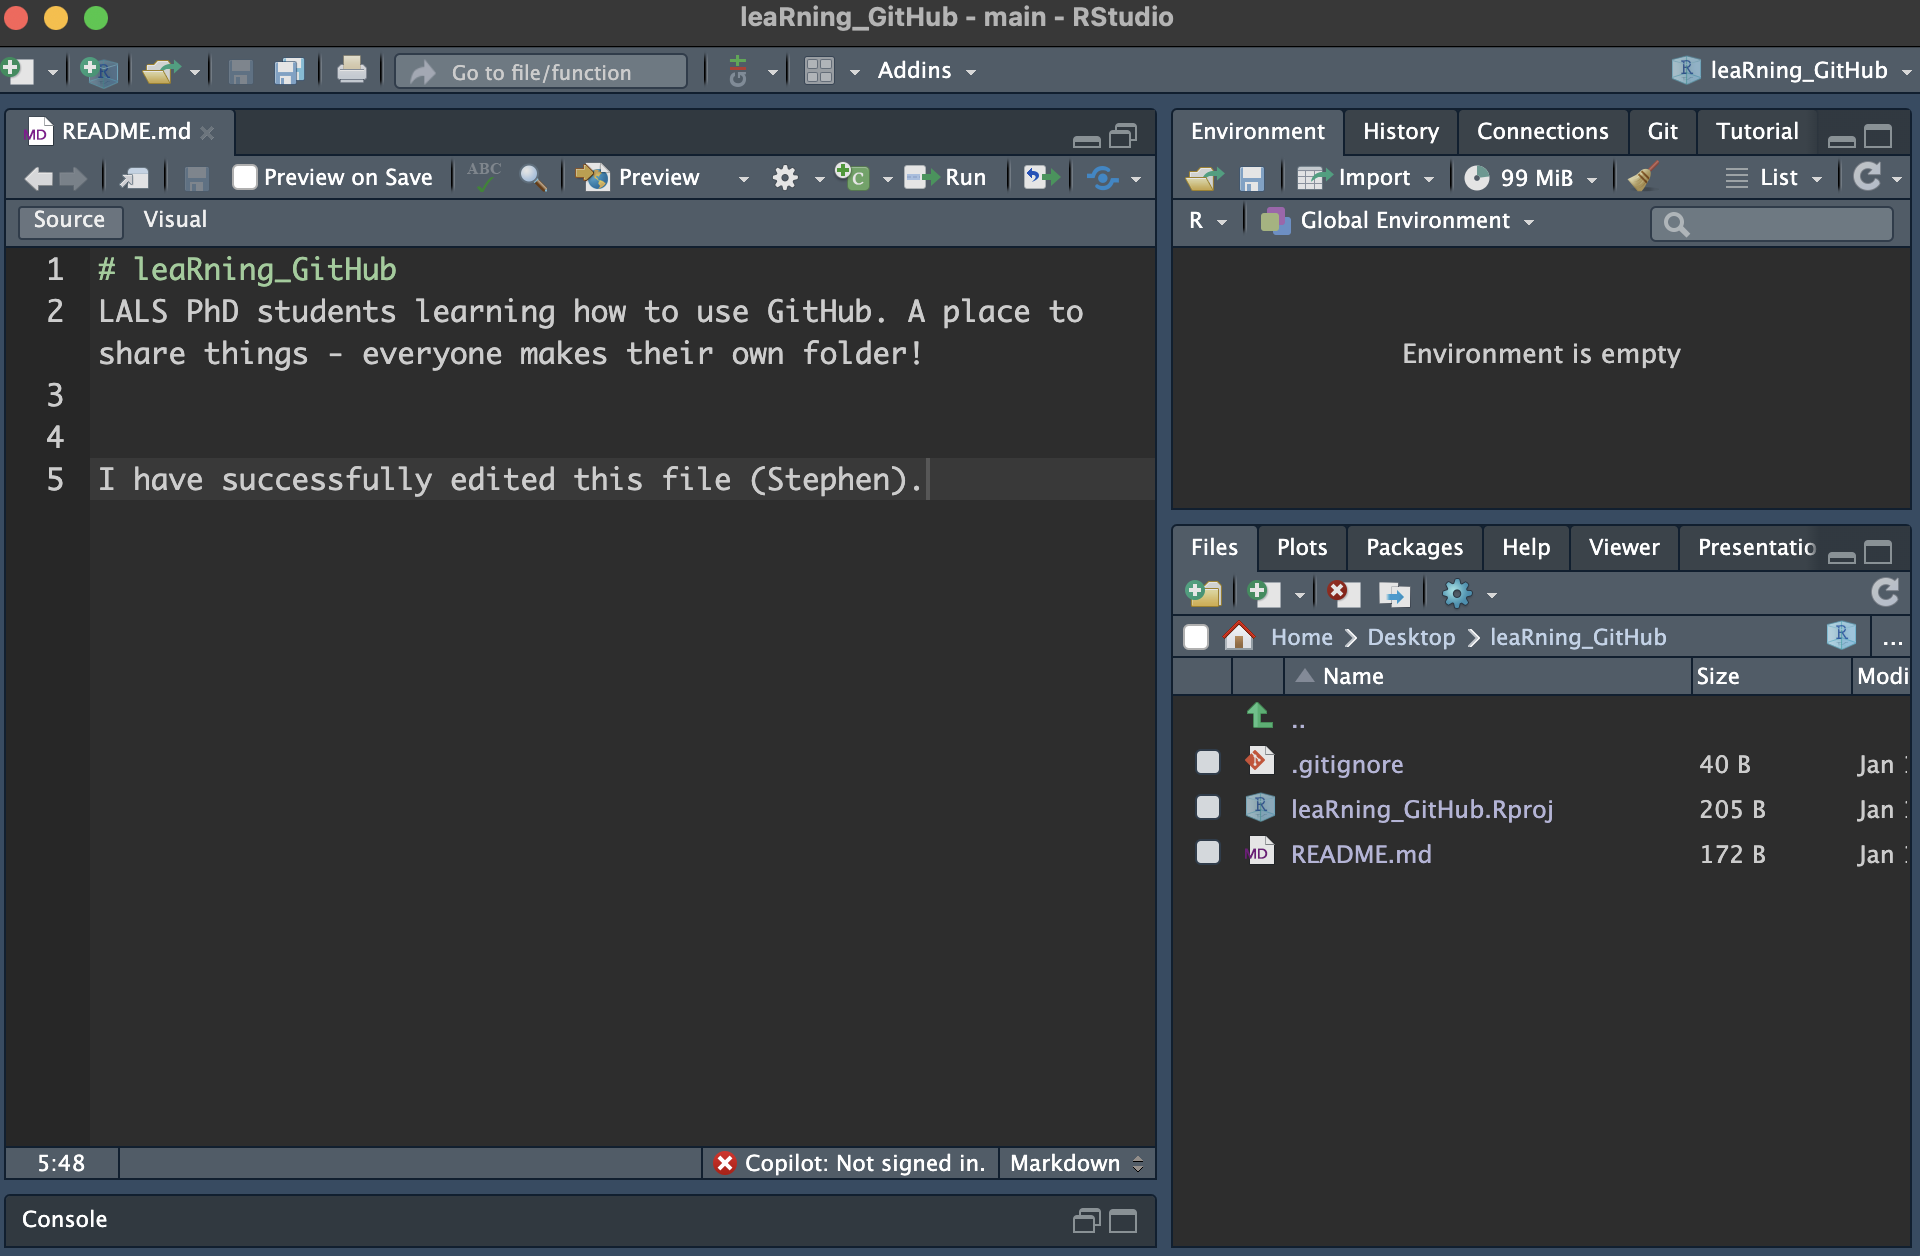
Now that you have the repository cloned, it’s time to make changes. There is a README.md file in the repository. Open this file within R Studio. Add a new sentence to the file and then add your name in brackets (like I did in the example.) Then save the file.
Now, look at the top right of your R Studio, you should see a “Git” tab. Click it and you should see something like this:
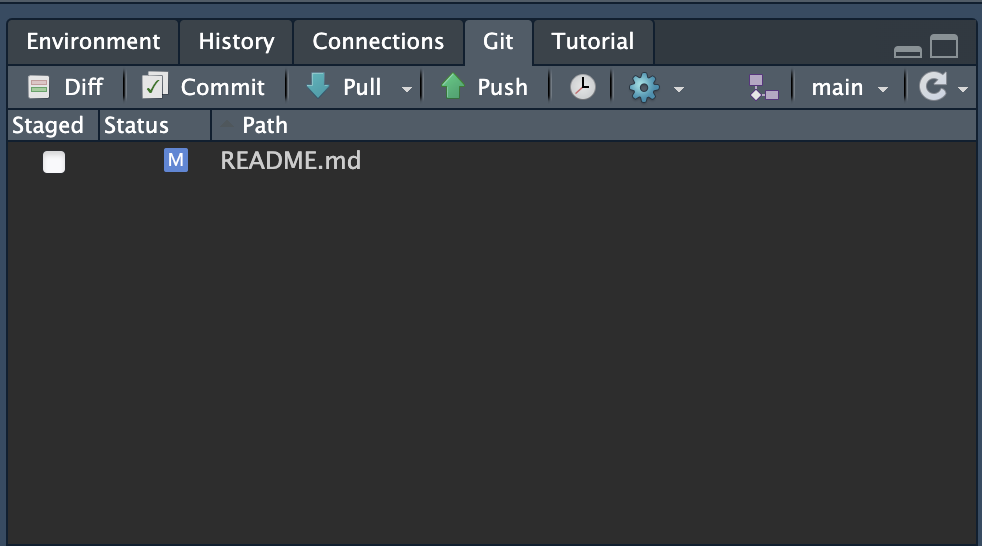
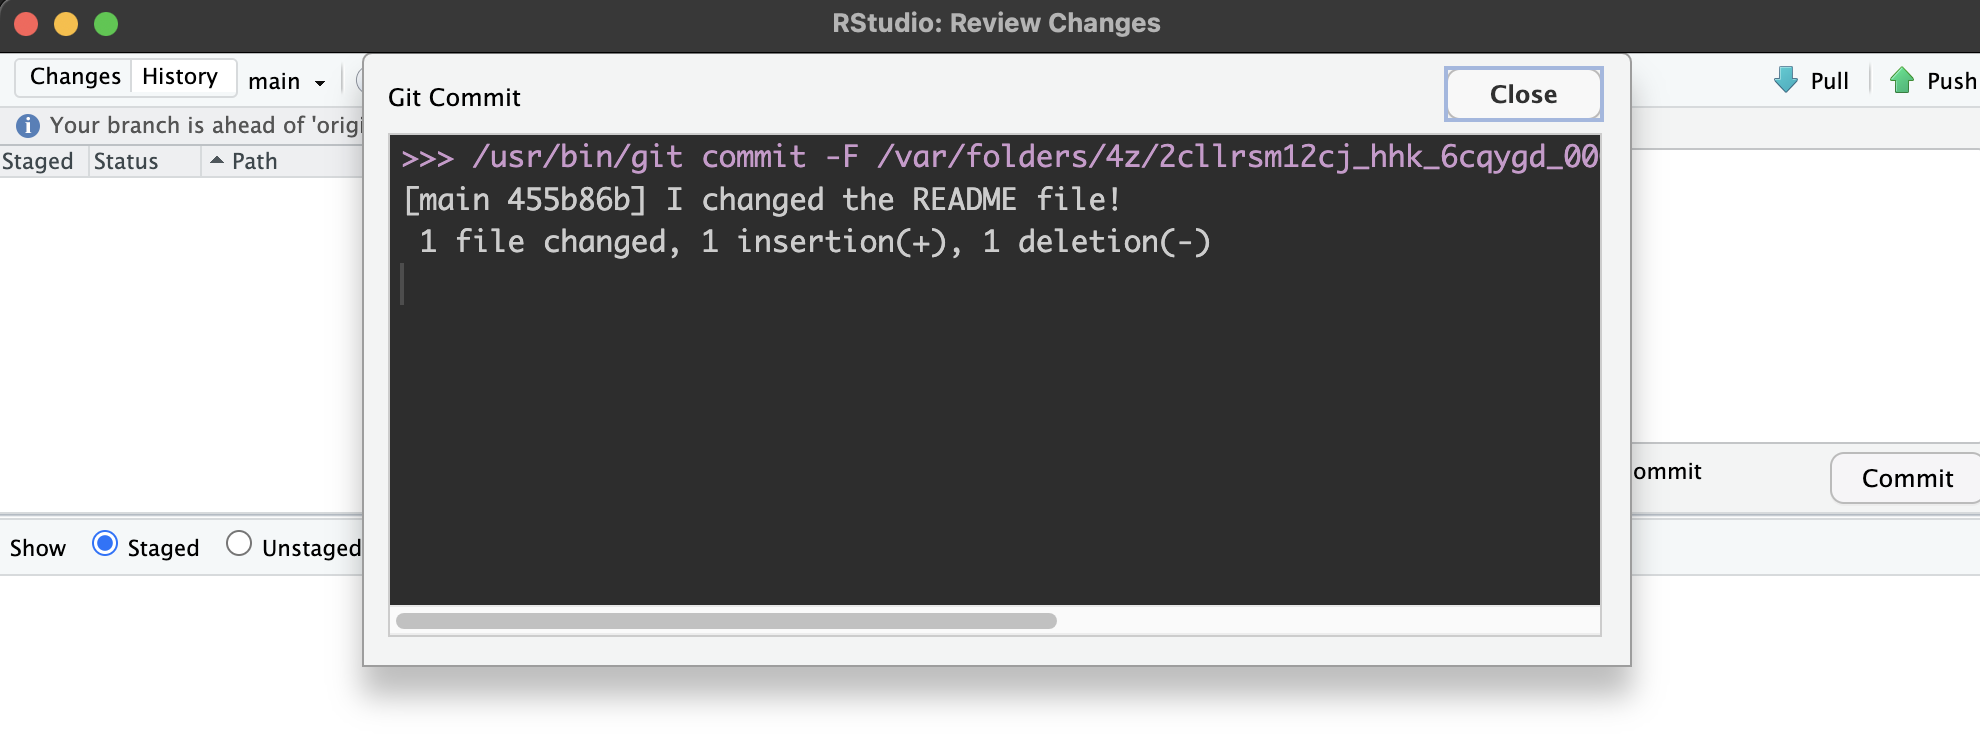
Click the “Commit” button. This is showing you that you have some changed files, and also previews the changes (red = deletions, green = additions). All changes to a GitHub repo must be committed first.
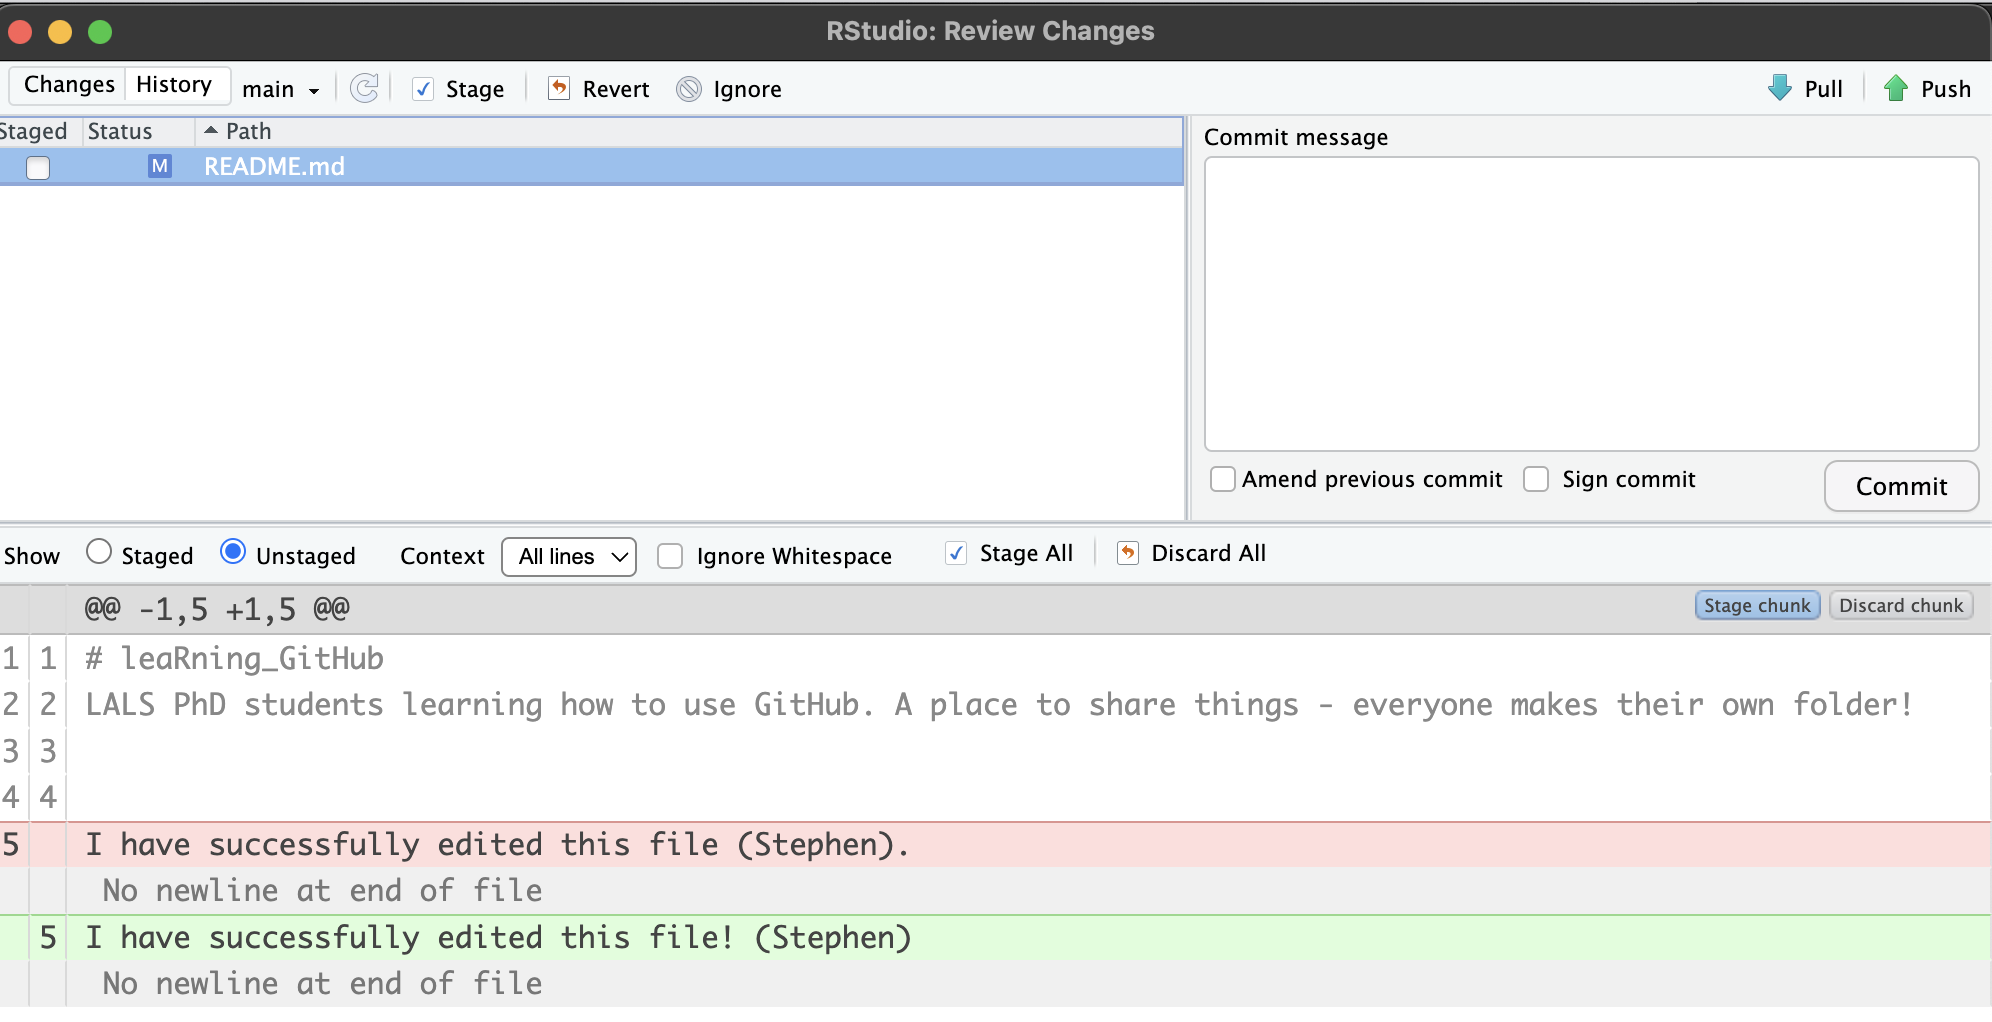
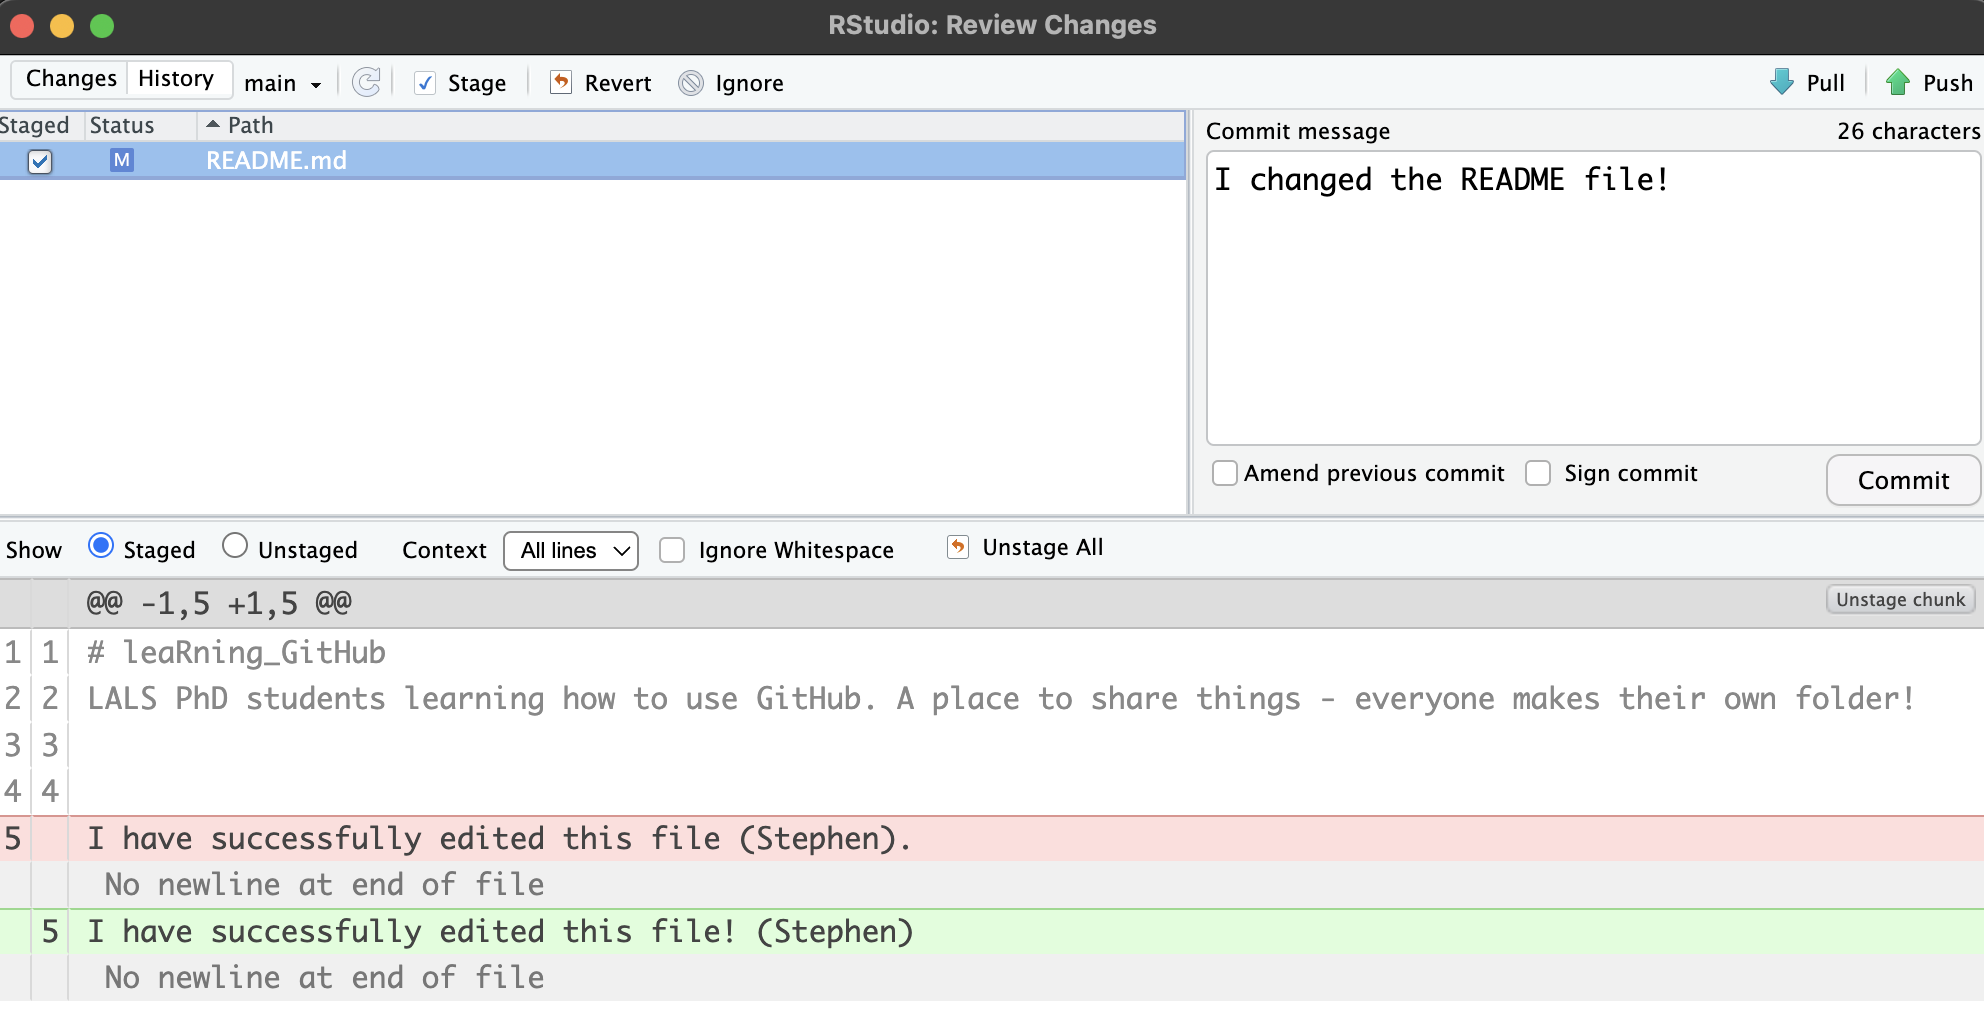
Type a comment in your commit which explains what you have changed and select all of the files you want to add to the repo. In this case, select README.md. When you are done, Click the Commit button under the comment box.
You are now ready to push your changes to the repository. Click the Push button on the top right. You should see something like this informing you that the changes are staged and ready:
Click, Close, and then click Push. You should see another pop-up which looks like this:
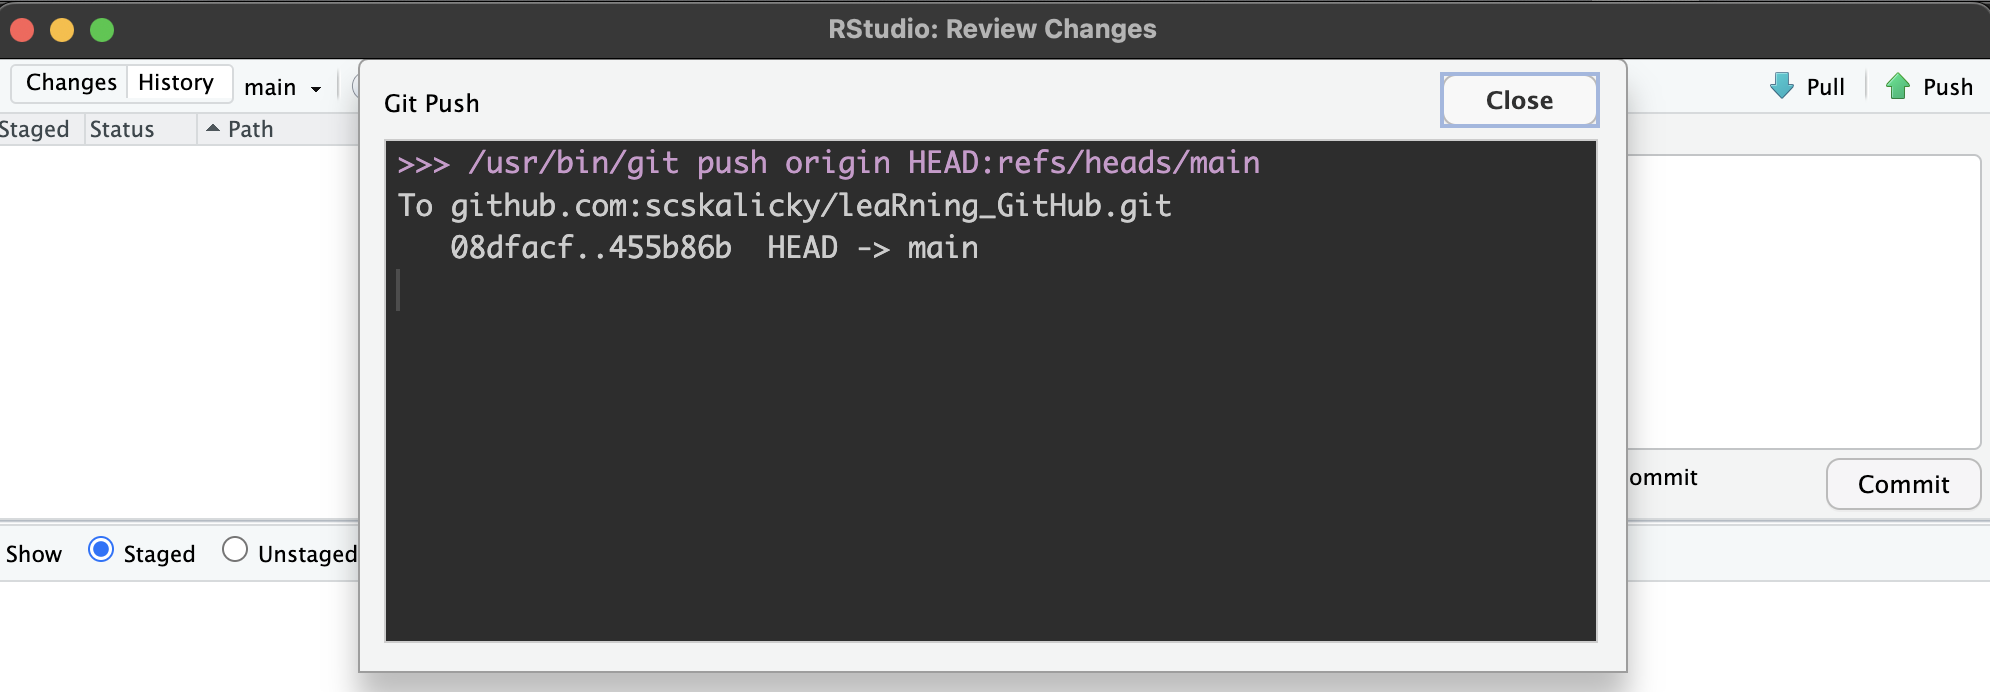
Congrats! You have modified the file and pushed it to GitHub! You can verify the changes by going to the GitHub page and looking at the file there.